How to Install a Train Horn: Step-by-Step DIY Guide
A step-by-step guide to installing a train horn kit on your truck or car: mounting the horns, compressor, and tank, plumbing air lines, and wiring it all up.
Installing a train horn is one of the most satisfying weekend mods you can do, and on most trucks it’s well within reach of anyone comfortable with a wrench and a test light. This step-by-step guide walks through a full train horn install — mounting the horns, compressor, and air tank, plumbing the air lines, and wiring the electrical side so it works the first time you hit the button.
What you’re actually installing
A train horn isn’t a single part — it’s a small air system, and knowing what each piece does makes the layout obvious.
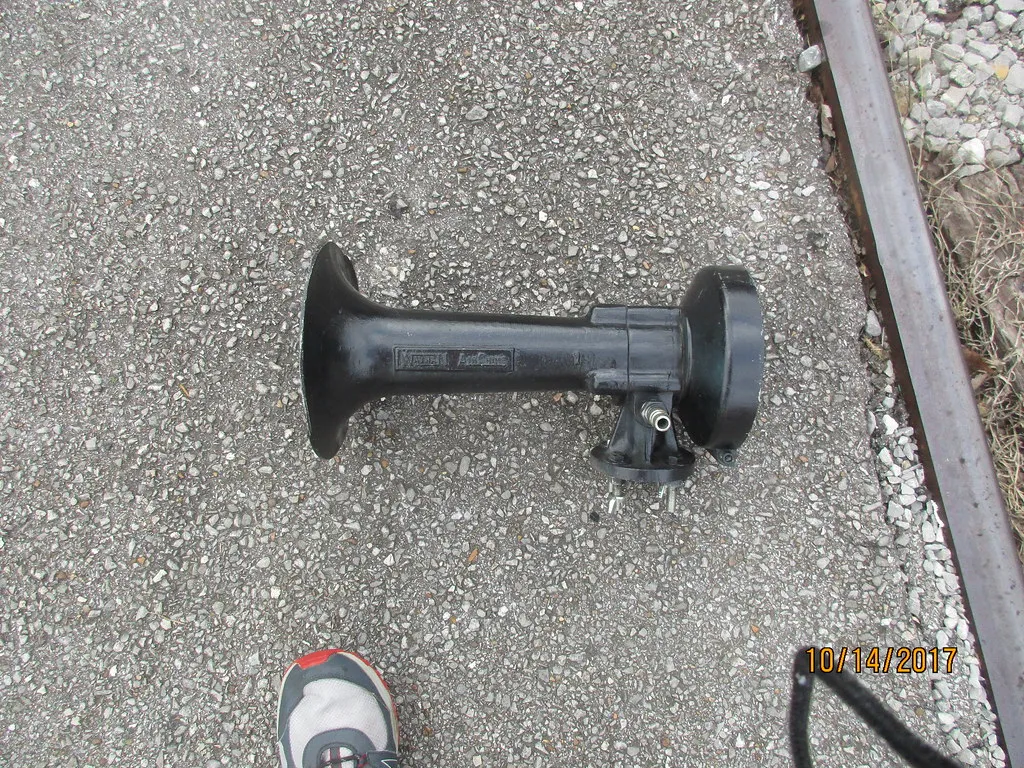
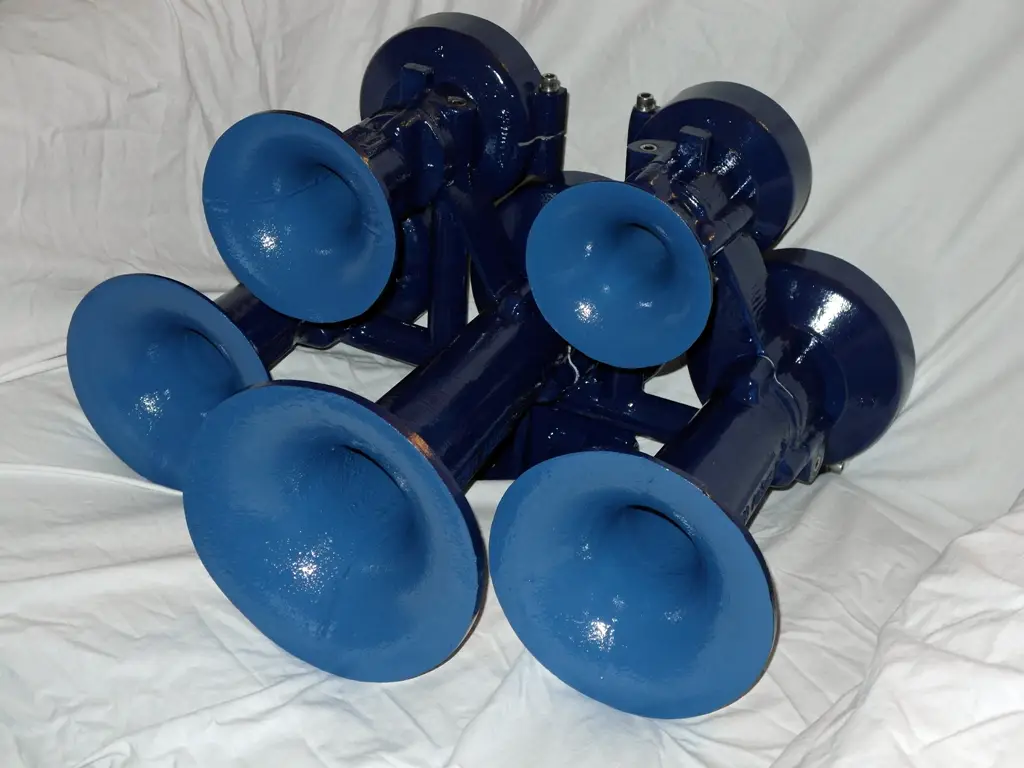
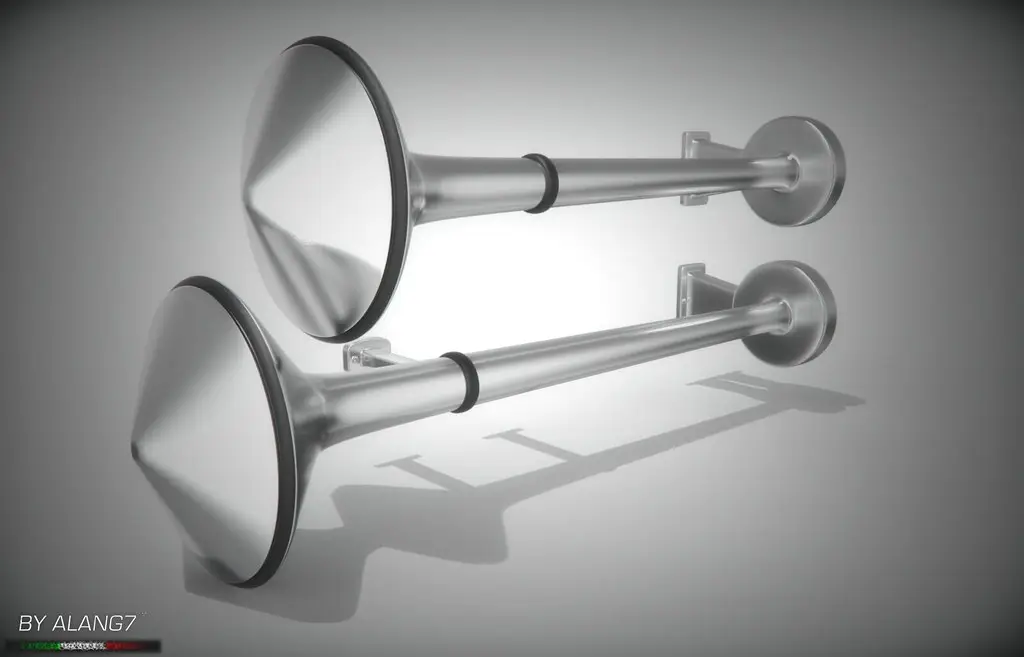
- Horns
- The trumpets that make the sound. One to four, usually cast aluminum or ABS.
- Compressor
- 12V pump that fills the tank with air.
- Air tank
- Stores compressed air so the horn has volume to blast on demand.
- Pressure switch
- Auto-starts the compressor when tank pressure drops and stops it when full.
- Solenoid valve
- The electric valve that dumps tank air into the horns when you press the button.
- Relay, fuse, wiring
- Carries the heavy current the compressor needs without frying your dash switch.
The basic flow is simple: the compressor fills the tank, the tank holds the air, and when you press the button the solenoid valve releases that air through the horns. If you want the full physics of why moving air makes that locomotive bellow, our explainer on how train horns work breaks it down.
Tools, time, and skill level
A first-time install on a pickup is a realistic half-day to full-day job. Budget more time if you’ve never run wiring under a vehicle. Here’s what you’ll want on the bench before you start.
- Socket and wrench set plus a cordless drill
- Wire strippers, crimpers, and a test light or multimeter
- PTFE (Teflon) thread sealant tape for every air fitting
- Self-tapping screws or bolts for mounting brackets
- Zip ties and split-loom tubing to protect wiring and air line under the frame
- A jack and stands if you’re mounting components underneath
Most complete kits ship with the relay, fuse holder, pressure switch, and pre-cut wiring, so you rarely need to source electrical parts separately. Read your kit’s manual alongside this guide — terminal labels and bracket shapes vary by brand.
Step 1 — Mount the horns
The horns are the bulkiest piece, so place them first and build the rest of the system around them. Common spots are under the bed, behind the grille, along a frame rail, or in the engine bay if there’s room.
- Find a flat, solid surface with clearance for the full length of the trumpets and a clear path for sound to escape.
- Hold the bracket in place and mark your holes.
- Drill and bolt the horns down with the supplied hardware, then double-check the fittings are snug.
Point the trumpet openings down or to the rear so they shed water and road grime — a horn pointed straight up will eventually fill with debris. Keep the horns away from extreme exhaust heat where you can.
Step 2 — Mount the compressor and air tank
The compressor can be mounted upright or horizontally, but never inverted — that’s a common rule across install manuals because mounting orientation affects how the pump’s internals and drain behave. Pick a spot with good airflow for cooling and keep it reasonably close to your power source to shorten the heavy battery run.
For the tank, choose a protected location away from the cab and out of high-traffic areas under the vehicle. Mounting the tank a bit farther from the compressor and giving the air line some length actually helps the sound. Secure the tank with its mounting hardware so it can’t rattle loose.
- Don’t mount the compressor where it sits in standing water or direct exhaust heat
- Don’t bolt the tank against the cab floor where vibration transmits into the cabin
- Don’t skip thread sealant on the tank’s drain and port fittings
Step 3 — Plumb the air lines
This is where leaks are born, so slow down. Brush or wrap PTFE thread sealant onto every threaded air fitting before you tighten it. The plumbing order is straightforward.
- Compressor output to the air tank inlet
- Pressure switch threaded into a tank port
- Tank to the solenoid valve
- Solenoid valve to the horns
Route the air line away from sharp edges, suspension travel, and hot exhaust, and run it through split loom anywhere it passes along the frame. Leave roughly an inch of slack per run as a buffer so a tug on the line doesn’t pull a fitting loose. Do not fill the tank above 150 PSI — that’s the standard ceiling for these systems, and most kits use a 110/150 PSI pressure switch that cuts the compressor in around 110 PSI and shuts it off at 150. If you’re weighing a self-contained electric kit against a full air-tank setup like this one, our air-tank vs battery comparison lays out the trade-offs.
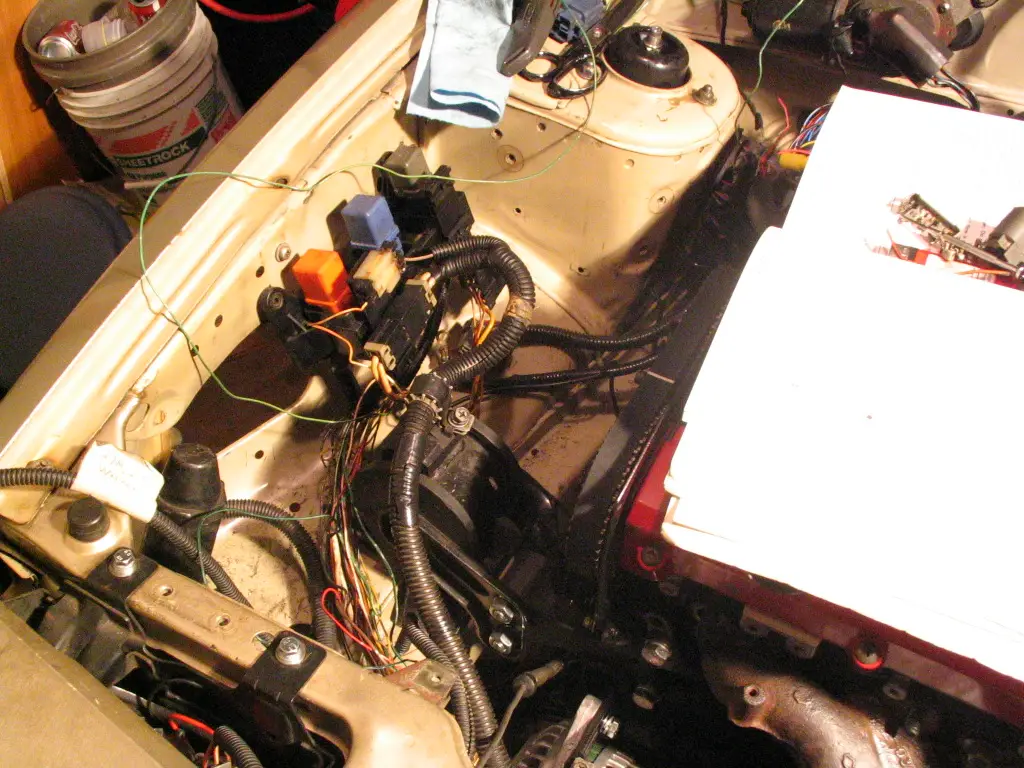
Step 4 — Wire the electrical system
The wiring is what intimidates most first-timers, but a train horn circuit is just a relay letting a small button control a big current. The compressor pulls far more amperage than a dash switch can safely carry, so the relay does the heavy lifting while your button only triggers it.
Using the typical four-terminal relay layout from kit wiring guides:
- Pin 30
- Power from the battery positive, through the inline fuse, using heavy 10-gauge wire
- Pin 87
- Out to the compressor’s positive lead
- Pin 86
- Jumpered to Pin 30 with light 18-gauge wire
- Pin 85
- Ground to the vehicle frame, with the push button in that circuit
Protect the main power lead with the supplied fuse — many direct-drive kits spec a 35A fuse. The pressure switch ties into this circuit so the compressor only runs when the tank needs air, not constantly. The solenoid valve gets its own switched 12V feed from your horn button so pressing the button releases the air. Ground everything to clean, bare metal, and keep the fuse holder close to the battery so a short can’t cook the wire.
- Never run compressor power straight off a thin dash-switch wire — you’ll melt it
- Never skip the inline fuse near the battery
- Don’t ground to painted or rusty metal; scrape to bare steel first
Step 5 — Test, tune, and troubleshoot
With the fuse installed, power up the system. The compressor should start with a steady whirring sound as it fills the tank, then shut off on its own once the pressure switch hits its cut-off point. When the tank is full, press the button — you should get a clean, full blast.
If something’s off, work the system in order:
- No compressor sound — check the fuse, relay seating, and grounds
- Compressor runs but never stops — verify the pressure switch wiring and that it reads tank pressure
- Weak or sputtering horn — you likely have an air leak; spray soapy water on the fittings and watch for bubbles
- Horn won’t fire — check the solenoid valve’s switched power and ground
Finally, check your local law before you lean on it in public. A train horn is loud enough to matter legally — see our 2026 train horn buyer’s guide for how legality factors into choosing and using a kit, and our decibels explainer for what those sound numbers actually mean.
FAQ
How long does it take to install a train horn?
Plan on a half-day to a full day for a first-time DIY install on a truck. The horns and tank mount quickly; running wiring cleanly and chasing down air leaks is what eats the clock. A second install always goes faster.
Do I need a relay to wire a train horn?
Yes. The compressor draws far more current than a dash button or stock horn wire can handle. The relay lets your low-current button switch the high-current compressor feed safely, which is why kit wiring guides build the circuit around one.
What PSI should a train horn run at?
Most kits use a 110/150 PSI pressure switch — the compressor kicks on around 110 PSI and shuts off at 150 PSI. Standard guidance is to not fill the tank above 150 PSI.
Where should I mount the air tank?
In a protected spot away from the cab and out of high-traffic areas under the vehicle, secured with its mounting hardware. Giving the line from the compressor some length is fine and can even help the sound.
Why is my train horn leaking air?
Almost always an under-sealed fitting. Every threaded air connection needs PTFE thread sealant tape, snugged tight. Spray soapy water on each joint with the tank pressurized and watch for bubbles to find the culprit.
Can I install a train horn myself?
Yes, if you’re comfortable with basic hand tools, drilling mounting holes, and running 12V wiring. The trickiest parts are leak-free plumbing and a clean relay circuit. If electrical work makes you nervous, many shops will handle just the wiring.
Sources
- HornBlasters — Electric Air Horn Relay Wiring Guide — relay terminal assignments (pins 30/85/86/87), 35A fuse, 10-gauge power and 18-gauge control wire, compressor test behavior.
- Train Horns US — Train Horn Installation Guide (archived) — mounting order, compressor orientation, tank placement, plumbing sequence, PTFE sealant, ~1 inch line slack, 150 PSI tank ceiling. Original site unreachable as of July 2026; link points to the archived copy.
- HornBlasters — 110-150 PSI Pressure Switch — 110/150 PSI cut-in/cut-out pressure switch behavior.
- HornBlasters — Instructions & Manuals: Wiring Diagrams and Schematics — kit-level wiring and plumbing schematics referenced for system layout.
Keep reading
Frequently asked questions
Quick answers to the questions people ask most about this topic.
- How long does it take to install a train horn?
- Plan on a half-day to a full day for a first-time DIY install on a truck. The horns and tank mount quickly, but running wiring cleanly and chasing down air leaks is what eats the clock. A second install always goes faster.
- Do I need a relay to wire a train horn?
- Yes. The compressor draws far more current than a dash button or stock horn wire can safely handle, so the relay lets your low-current button switch the high-current compressor feed. That is why kit wiring guides build the circuit around one.
- What PSI should a train horn run at?
- Most kits use a 110/150 PSI pressure switch, so the compressor kicks on around 110 PSI and shuts off at 150 PSI. The standard guidance is to not fill the tank above 150 PSI.
- Where should I mount the air tank?
- Choose a protected spot away from the cab and out of high-traffic areas under the vehicle, secured with its mounting hardware. Giving the line from the compressor some length is fine and can even help the sound.
- Can I install a train horn myself?
- Yes, if you are comfortable with basic hand tools, drilling mounting holes, and running 12V wiring. The trickiest parts are leak-free plumbing and a clean relay circuit, so if electrical work makes you nervous many shops will handle just the wiring.
Related reviews & guides
Train Horn Installation Cost: DIY vs Shop Labor Breakdown (2026)

Train Horn Activation Options: Button, Toggle, Remote or Stock Horn
Train Horn Amp Draw, Fuse Size & Wire Gauge: Sizing Guide
Train Horn Onboard Air Uses: Tires, Air Tools & Suspension

Adding a Second Air Tank to a Train Horn: Worth It?